Our love for Gravity Forms(aff) continues. Yes it costs money. And yes, its worth it. This time it’s because of how we integrated Gravity Forms with Salesforce.
Goal: Capture leads from the website, including the Adwords and Google Analytics parameters, and pass them to Salesforce.
Plugins you’ll need:
- Install Gravity Forms.
- Install the Gravity Forms for Salesforce Addon Plugin. This is not an official Gravity Forms plugin, and doesn’t have much support, and isn’t actively updated, but… it works, at least for now.
- Install the Gravity Forms Prepopulate plugin. Also, not an official Gravity Forms plugin, but it’s so simple and works beautifully.
Step 1: Company field is required by Salesforce
Salesforce requires the company field but we didn’t want our form to require it so we used this code in functions.php:
<?php add_action( 'gform_pre_submission', 'pre_submission_handler' );
function pre_submission_handler( $form ) {
if ( ! rgpost( 'input_3' ) ) {
$_POST['input_3'] = 'Company Not Filled Out';
}
}
Step 2: Create hidden fields in Gravity Forms to capture the Google Adwords (GCLID) and Google Analytics (utm_campaign, etc) parameters
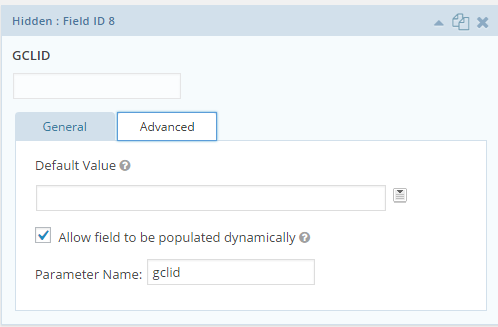
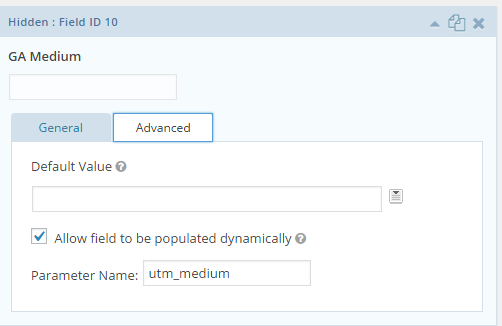
Create hidden fields in Gravity Forms for each parameter you need, such as: utm_source,utm_campaign,utm_medium,utm_term,utm_content, and gclid.
Click on the Advanced tab, and check the box for “Allow field to be populated dynamically”.
Add the parameter name.


Step 3: Save parameter values in a cookie so they can be passed to Salesforce
The hidden field works great if someone goes to a direct link with all the parameters and fills in a form.
Ex.
http://test.com/?utm_source=testcampaign&utm_medium=testmedium&utm_term=testterm&utm_content=testcontent&utm_campaign=testcampaign
But if a user goes to another page on the site and then comes back and fills in the form, then we’ve lost all the data.
Therefore, we need to save the parameters with a cookie. That’s where the fabulous Gravity Forms Populate plugin comes into play. Go to the plugin settings and enter the parameters.

Step 4: Pass lead info to Salesforce
Now that we have all the info to send, we need to set up the Salesforce plugin and pass the lead info to Salesforce.
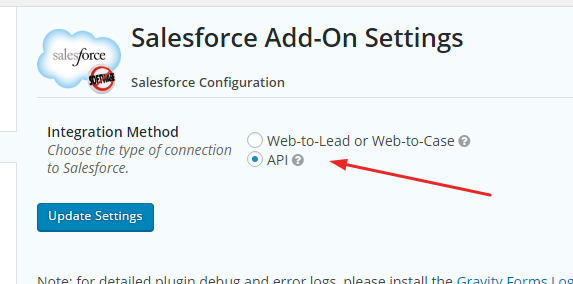
Make sure to use the API and not the Web to Lead. Web to Lead didn’t work with custom fields.

Connect the plugin to your Salesforce Account

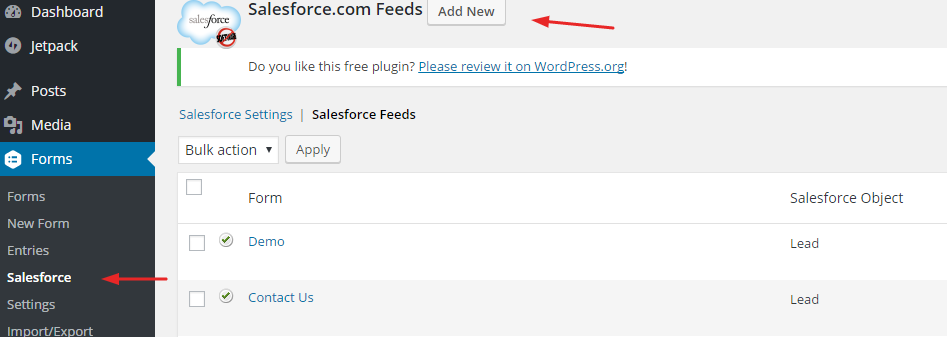
Go to Forms > Salesforce and click Add New

Select what Object you want to use. We used Lead.
Select the form to integrate with.

Map your form fields to your Salesforce fields

Step 4: Test all the things
You can use the Google link builder to get a test url with all the parameters. (You can learn more about the link builder here)
Click on the test url (ex. http://test.com/?utm_source=testcampaign&utm_medium=testmedium&utm_term=testterm&utm_content=testcontent&utm_campaign=testcampaign)
See if your parameter values are getting stored in a cookie with the Resources tab in the Chrome console

Fill out the form and check in Salesforce to see if the info is there!
Good luck!

