

I recently had to move all my WordPress sites and blogs to a new server because Bluehost sucks. My sites were going down on a near-daily basis for way too long, and they couldn’t care less. So I did what I really did not want to do, and moved six WordPress sites to a new hosting provider, which has proven itself with my clients’ sites: Hostgator. And along the way I’ve learned quite a few things about what to pay attention to when moving WordPress sites from one place to another, which I’d like to share.
Lesson 1: WordPress’ native XML export is not good enough
In WordPress, you can easily export a site by going to Manage > Export, which will create a unique XML file that you can import in any new site. This is fine for a very simple, single-user blog without heavy customizations. However, if your blog has multiple users, and if you have added info to their profiles, that info will be lost in this export. In addition, all users will be given a permission level of Subscriber, which is annoying if you need to go and change everyone back to their original permission level.
Also, if you have installed plugins that created new tables in your database, these will not be exported.
And, if you had any links saved, this will not save your links. See Lesson 6 below for more information on this, but the point is that the only way to save your links AND their categories is to export your entire database.
Therefore, in order to retain all settings and information that your site needs, the only way to do so is to export your entire database, and then import it to the new WordPress installation.
Exporting and Importing a WordPress blog
Here’s how you export and import your WordPress database. WARNING: Messing with databases in PHPMyAdmin can be hazardous to your health and to the health of your site. One wrong move and everything will be but a distant memory. So make sure to backup like crazy; and I take no responsibility for any harm you may come to by following my instructions. Now, let us begin:
- Log in to PHPMyAdmin via your control panel or however else you log in.
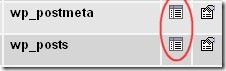
- If you have multiple WordPress blogs on one server, you may see a list of databases in the left-hand sidebar. Make sure you are dealing with the right database. The way that I check which database is the right one is by browsing the database and viewing the information there, whether it’s posts or even meta data like the blog name. To browse, click on the browse icon next to a table’s name (Note: your PHPMyAdmin interface may look a bit different, depending on the version you are using):
- Once you are sure you are in the right database, click on Export at the top of the PHPMyAdmin toolbar:

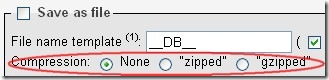
- On the Export screen, I usually leave all the settings as is, but I do make sure to to 2 exports: a compressed (gzip) export, and a regular export, just in case. So export one while selecting None, as shown below, and one while selecting gzipped:
- Now on to importing: install WordPress on your new server.
- Go in to PHPMyAdmin for your new server, and delete all your tables for your new WordPress installation (Yikes!). In PHPMyAdmin, to delete is called to “drop.” So on your main database page, select all your tables and click on Drop, or on the red Xs next to the table names:

- Now, import your exported WordPress database into your new installation. To do that, stay in PHPMyAdmin for your new site, and click on the Import tab that is to the right of the Export tab on the toolbar (see image in step 3 above).
- Browse to find your exported database file. Leave the rest of the settings, and click Go.
- Now your old WordPress database is in your new installation. It may work at this point, so go check. If it does, great. If not, continue reading.
- You need to make sure that your database table names work with the new installation of WordPress. This means the following: if you installed your old database with Fantastico, all your database tables have a prefix of wp_. If you didn’t install it with Fantastico, the database tables probably don’t have a prefix. Your new database tables may have a different naming convention depending on how you installed it. So, take a look at your database table names, and note if they start with wp_ or not. Now it is time to open wp-config.php.
- Once you have opened wp-config.php, look at line 16, which says something like this:
$table_prefix = ‘wp_’;
If your database tables start with the wp_ prefix, leave the line as above. If they don’t have a prefix, change it to:

$table_prefix = ”;
Now your blog should mostly work (I hope)! But there are a few more things that we need to take care of:
Lesson 2: Widgets are not preserved with an XML backup, even with a full database backup
If you are using widgets somewhere in your blog, you will have to redo them one by one on your new blog if you use the XML backup. So take out a pencil and paper, and write down exactly what widgets you are using, what order they’re in, and any modifications or customizations that you made to them. Ok, you can use Word or Notepad if you want, but that’s about as technologically friendly as you can get.
Lesson 3: In addition to backing up your theme and plugins folder, remember your Uploads folder!
In your blog under Settings > Miscellaneous, you have set where any uploaded files or images will be stored. Make sure to backup that folder, in addition to your theme and plugins folder, so that you will have all those files in your new blog. In your new blog, go to Settings > Miscellaneous and make sure it’s pointing to that re-uploaded Uploads folder.
Lesson 4: Make a note of your site’s permalink structure
You want to retain the same permalink structure for your new site so that you can continue to enjoy the same traffic you had before from search engines and incoming links. So make note of your permalink structure, and once your new blog is installed, make sure to go to Settings > Permalinks, and set the same structure there.
Lesson 5: Don’t forget your favicon
Your favicon can get lost in the shuffle. Make sure to back it up, and upload it to your new site.
Lesson 6: It is hard to preserve WordPress blogroll links and their categories
Here at WordPress Garage, I had a page until recently called “Links we Love.” I had painstakingly added, categorized and described many links that I thought were useful to my readers. Well, during the whole server move, the links got lost because we didn’t export them by going to wp-links-opml.php, and saving that OPML file as a text file for importing later. In any case, even if I had saved that and imported it here, I would have lost all my categories anyway. So just note that if you’re depending on the XML backup, you will lose all your links. If you back up your links with the OPML file, you will lose your categories.
——————-
To sum up: try not to ever have to move your WordPress blog from one server to another, and you will add years on to your life.
Happy blogging!
Pingback: Wordpress blogu bir hosttan di?er hosta ta??mak için yap?lmas? gerekenler | Gedop.net()
Pingback: links for 2008-09-21 | Blog of the FML()
Pingback: Welcome back WordPress Press This bookmarklet! I missed you. | Wordpress Garage()
Pingback: John Rundle » Blog Archive » Moving WordPress blog from UK2.net to 1and1.co.uk()
Pingback: Exporting & Importing a Wordpress Blog, MySql Database | Mona Sutherland()